How do I create an AutoRun menu for a USB stick?

USB sticksWith USB sticks it is easy to distribute a large number of files, or large files, to other persons. For example software, videos, documents, drawings, etc. USB flash drives are also fast (especially USB 3.0 drives are very fast), so it does not take long time to copy (or install) the contents on a USB stick to a hard disk. But navigating can be a problem if the USB flash drive contains lots of files. The user can have problems to locate all of the files on the drive. The solution to this is to create a menu interface.

AutoRun menu interfaces
There exist many menu designer tools on the market that can create menu interfaces for USB flash drives. But what about AutoRun menu interfaces? Menus that open automatically? Is this even technical possible?
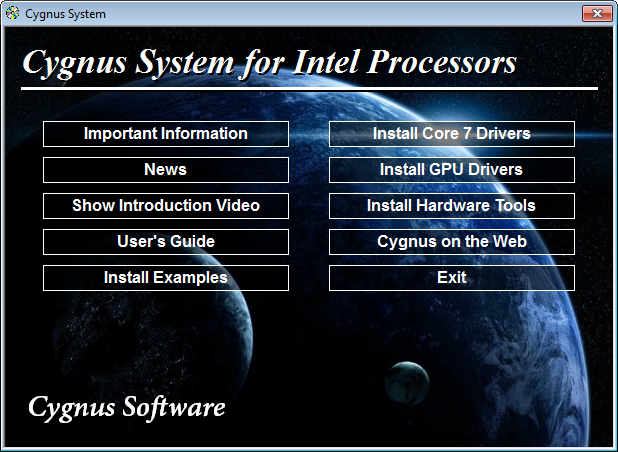
Menu interface for a USB stick

Microsoft disabled the AutoRun function for USB sticks
Microsoft disabled the AutoRun function for USB sticks a few years ago, so it does not work as with CDs and DVDs, as it did before. Until the year of 2011 you only needed to add the filename of the menu to an Autorun.inf file (that you put on the USB flash drive) and the menu would open automatically when somebody inserted the USB stick into a USB port. But today this method does not work. If you try the same today, the menu will not open automatically. Instead will Windows AutoPlay window be shown on the screen, and you must click on the Windows Explorer option in the AutoPlay window to open Windows Explorer, and thereafter manually locate the menu program file on the drive and run it.

Does it have to be in this way?
Does it have to be in this way? Is there really no way to create an AutoRun menu and have the menu be opened 100% automatically? We will give you the answer to this question in this new article on our website:

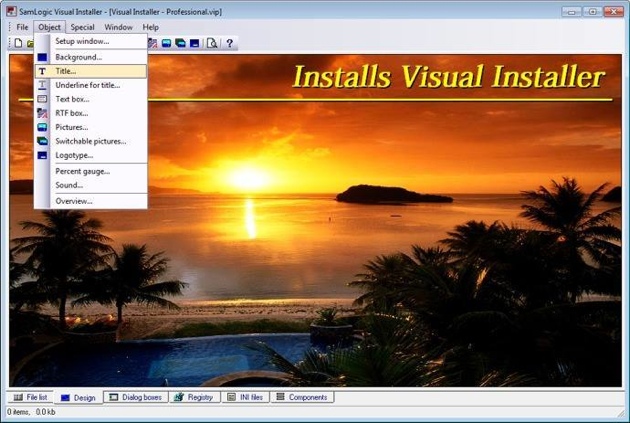
> How to Create an AutoRun Menu For a USB Flash Drive

Is it possible to create an online installer with Visual Installer?

The answer is: Yes, it is possible.

With the installation tool SamLogic Visual Installer you can create a simple installer with no or very little user interaction. You can turn off all setup dialog boxes, or maybe leave one information dialog box visible that informs the user that this is an installation. The rest of the installation can be run silently, with no dialog boxes and no user interaction. If the user chooses to run the installation directly on the webpage instead of saving it, the installation will be made very smoothly. By creating a self-extracting setup file (one single compressed EXE file) the user only need to download one file, and only click on one file, to start the installation.

Visual Installer

Code sign your setup package
Sometimes the installation needs administrator privileges to install some files, and Windows will ask the user for permissions to install, but if you code sign your setup package also this will be a smooth process. Read more in these two web pages:
> What is Code Signing / Digital Signature / Digital Certificate? (Q&A)
> Visual Installer – Can create a code signed setup package

More information
> Tip: How to create a silent installation
> Tip: How to create a self-extracting setup

How to complete MSI installation #1 before #2 starts (when running multiple installations)

Sometimes it is necessary to run and complete one MSI installation before the next MSI installation starts. This may happens if your software is dependent of some specific prerequisites, also during the installation. One common problem is that one component can not be installed and registered in the system, in a proper way, before some basic components that it needs are installed first. The installation of these basic components must be completed first, otherwise the next installation may fail.

It is possible to create setup packages where one installation is completed before the next one starts, but this can normally be tricky to achieve. But with the new script command MSIEXEC that we have added to Visual Installer, this is very easy done.

The MSIEXEC command is used to install MSI packages and MSIEXEC has a parameter with the name %Wait that is useful when multiple MSI setup packages need to be installed, and they must be installed in a specific order. If you set this parameter to WAIT Visual Installer will pause its own setup process until the installation of the MSI package is completed. Thereafter the installation (for example processing of more script lines) will continue.

Example
Below we will show you an example of how to use the MSIEXEC command.

MSIEXEC

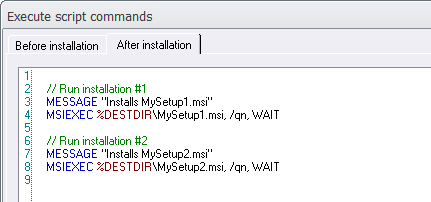
In this example Visual Installer will first install MSI file #1 (MySetup1.msi), waits until the installation of the MSI file is completed, and then install MSI file #2 (MySetup2.msi), and wait until this installation is completed, and then continue the rest of the installation.

(The script command MESSAGE can be used to inform the user what happens during the setup process. If the MSI installations are time consuming it can be a good idea to inform the user that another installation is running for the moment.)

More information about MSIEXEC
For more details about the new MSIEXEC script command, and for more examples of usage, see this tips & tricks page:
> Tip: Run MSI installation from script

See also
> Visual Installer: New script command that handles MSI installations

Visual Installer: New script command that handles MSI installations

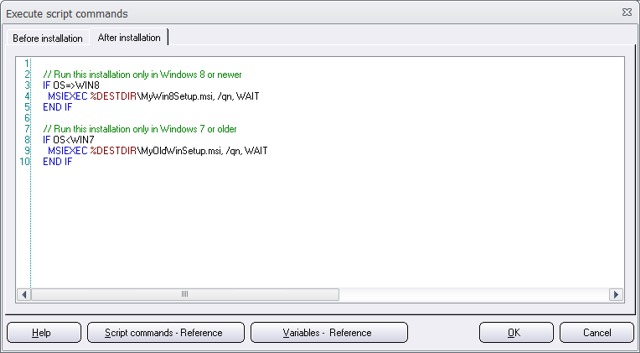
We have added a new script command to Visual Installer’s scripting language that handles MSI installations (Windows Installer installations). The name of the new script command is MSIEXEC and it is very flexible in its use. Via this script command you can for example start a silent or visible MSI installation, and you can choose whether Visual Installer should pause it’s own installation until the MSI installation is completed, or if the MSI installation and Visual Installer’s installation should be run in the same time (a parallel installation). And by combining the new script command with conditions, you can make Visual Installer run different MSI setup packages depending of the operating system.

MSIEXEC

We have added a tip page to the tips & tricks section of our website that explains in detail how to use the new script command. You can open the tip page by clicking on the link below:
> Tip: Run MSI installation from script

To use this script command, you must have Visual Installer 2014 / Professional version 10.0.15 or later installed in your computer.

Why does not AutoRun work with my CD / DVD drive?

Since Windows 95 all versions of Windows has supported the AutoRun technology. This technology allows programs and menu interfaces, that are distributed on CDs and DVDs, to be opened automatically when the disc is inserted in the computer’s drive.
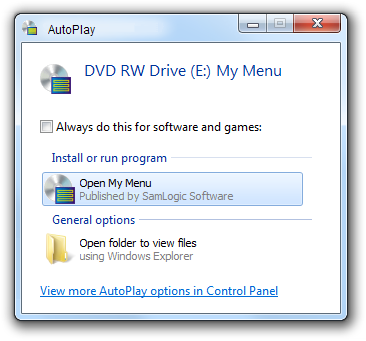
But sometimes, in some computers, nothing happens when an AutoRun CD or DVD is inserted in the drive. Or, a window with the title “AutoPlay” is shown on the screen with a list with options, and you must click on the program or menu name to open it. A window similar to this is shown on the screen:

The AutoPlay window
Why is that?

The reason why the AutoPlay window is shown instead of the program or menu is run automatically is that there is a system setting available in Windows (in Windows Vista and later) that decides how AutoRun and AutoPlay will work in the operating system. If the AutoPlay window is shown instead of the software is run automatically, the setting in Windows is very likely set to “Ask me every time”. If nothing happens at all, the setting in Windows is probably set to “Take no action”.

The setting can be changed
This setting can be changed to something else, for example to allow full AutoRun. You can change the default behaviour for AutoPlay via the Control panel in Windows. You can change the setting by following these steps:

If you have Windows Vista or Windows 7:
1. Open Windows Start menu
2. Click on the Control Panel option
3. Click on Hardware and Sound
Hardware and Sound option

4. Click on AutoPlay
AutoPlay option

5. Locate the Software and games combo box
6. Change the setting to “Install or run program from your media”
Install or run program from your media

7. Click the Save button

If you have Windows 8 or Windows 8.1:
1. Open the Start screen
2. Type “autoplay” (this opens the Search screen)
3. Click on Settings
4. Click on AutoPlay
5. Locate the Software and games combo box
6. Change the setting to “Install or run program from your media”
7. Click the Save button

Summary
If you choose the “Install or run program from your media” option, your Windows will support full AutoRun. And when you insert a CD or DVD in your drive, the program or menu will be run automatically.

Notes
There may be situations when the steps above is not enough. Read this article for more details:
> How to Enable / Disable Autorun for a Drive (using Registry)

Visual Installer: How to add a shortcut to an application

If you use Visual Installer to install an application, it is very likely that you want to add a shortcut to Windows’ Program menu, and maybe also to Window’s desktop, that starts the application when the user clicks on the shortcut.

List - Shortcut (icon)

We have published two tips on our tips & tricks pages for Visual Installer that describes how to create a shortcut to a program that is installed with Visual Installer. The first tip explains how to add a shortcut to Window’s Program menu, and the second tip explains how to add a shortcut to the desktop in Windows. Click on the links below to read the tips:

> Tip 1: How to add a shortcut to a program file
> Tip 2: How to create a desktop shortcut

Visual Installer: Where do I handle my setup dialog boxes?

The setup dialog boxes (the setup wizard) is a very important part of an installation. Via these dialog boxes you can give the user important information about the installation and let the user choose for example an installation folder, drive, program group, or ask for a license key or password. The setup dialog boxes are also a good opportunity to give your users a great first impression of your product or your company.

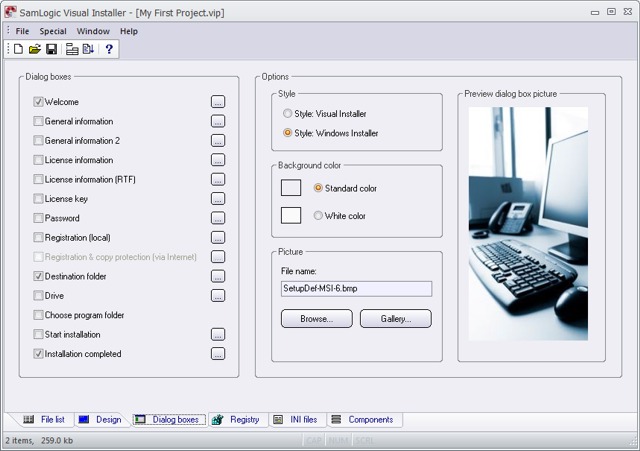
In our installation tool Visual Installer the setup dialog boxes are handled in the Dialog boxes tab of the editor (see the picture below).

Visual Installer

The following tip page will explain for you in detail how to choose setup dialog boxes to an installation, how to add text to the setup dialog boxes and how to change image for the setup dialog boxes. If you are new to Visual Installer we recommend you to read this tip page:

> Setup dialog boxes: How to choose dialog boxes, add text & change image

Visual Installer: Images for the setup dialog boxes

There are many ready-to-use images included in our installation tool SamLogic Visual Installer that can be used together with the setup dialog boxes (the setup wizard) that are shown for the end-user when he/she runs an installation. This video on YouTube shows some samples of dialog box images that follows Visual Installer.

More information about the built-in setup dialog box images in Visual Installer is available on this web page:
> Visual Installer: New setup dialog box pictures has been included

Video: Getting Started with Visual Installer

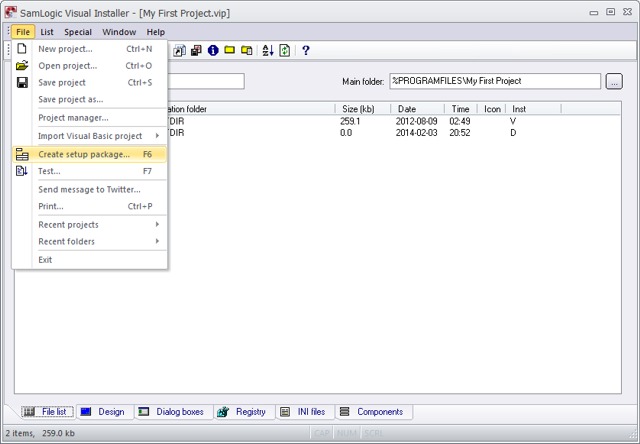
We have published a tutorial video on our website that helps you get started with our easy-to-use installation tool Visual Installer. The video shows how to create a basic setup project; for example how to start a new project, how to choose an installation folder for an installation, how to add files and how to specify texts for the installation dialog boxes. The video also shows how to save a project and how to build (compile) a setup package.

Getting Started with Visual Installer

Click here to watch the videoYou can view the tutorial video on this page:
> Getting Started with Visual Installer – Video

The tutorial is also available as text based tip pages. If you prefer the text version of the tutorial, you can go to this webpage:
> Getting Started with Visual Installer

ComponentSource is a new reseller for SamLogic’s products

ComponentSourceComponentSource, the world’s largest reseller of software components and development tools, is now an official reseller for SamLogic Software’s products, and will sell our tools for developers and designers. From ComponentSource you can from now buy the following three products from SamLogic:

> SamLogic CD-Menu Creator
> SamLogic USB AutoRun Creator
> SamLogic Visual Installer

ComponentSource Customer Services representatives speak many languages, including English, French, German, Italian, Spanish, Japanese, Korean, Cantonese, and Mandarin, and are available to assist you with all of your sales and technical queries about the three products listed above. If you have questions about our products and prefer to talk or write in other language than English (for example in Spanish or German) it can be a good idea to contact ComponentSource and ask your questions.

You can call ComponentSource free of charge in 47 countries. You can also send an email to the following e-mail address: sales@componentsource.com

Related links
> SamLogic Software’s products on ComponentSource
> You can call ComponentSource toll free in 47 countries
> About ComponentSource