Visual Installer 2020 has now been released

We have now released a new version of our setup tool SamLogic Visual Installer. The name of the new version is SamLogic Visual Installer 2020 and the version number is 11.8. Some new features in the new version are:

• Supports the latest version of Windows 10.
• Supports Microsoft .NET Framework 4.7.2 and 4.8.
• Supports AutoCAD 2019 and 2020.
• Supports Visual Basic 2019.
• Supports now also Visual C#.
• You can now comment files in the file list.
• The Registration dialog box now supports region/state and ZIP/postal code.
• Updated Run program after installation function.
• You can now specify your own picture to the uninstallation program/dialog box.

A detailed list of new features in Visual Installer 2020 is available on this web page.

CD-Menu Creator 2020 has now been released

A new version of our menu designer tool CD-Menu Creator has now been released. The name of the new version is SamLogic CD-Menu Creator 2020, and some of the new features in the new version are:

• Supports the latest version of Windows 10.
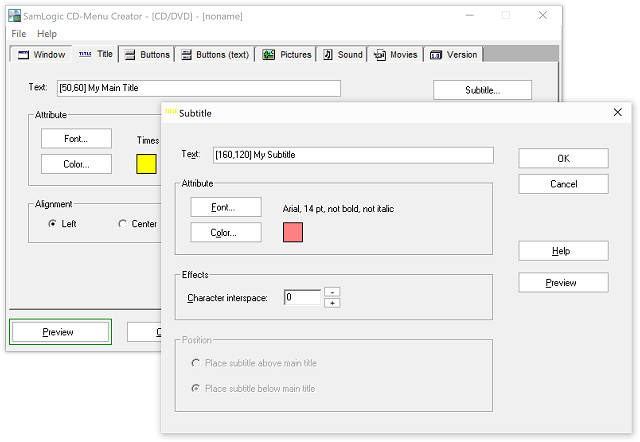
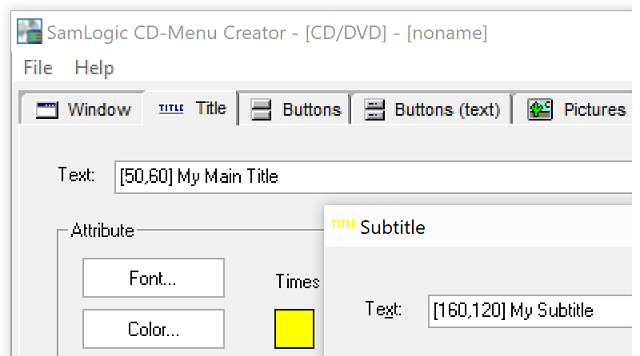
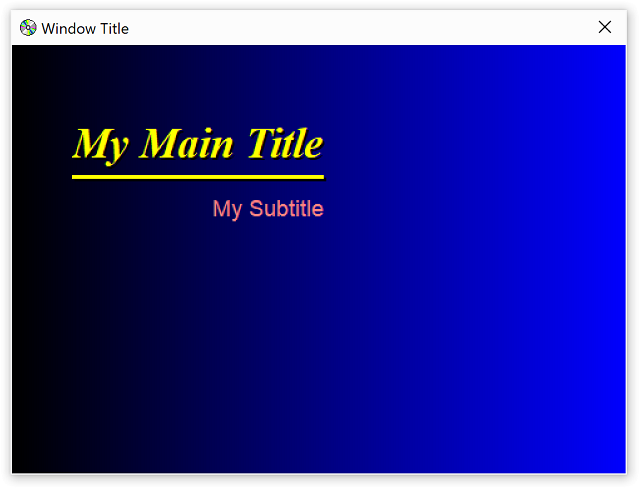
• You can now specify a position for the sub title text.
• You can change font size for the button’s tip text.
• Supports https in web links.
• New menu interface examples have been included.

A more detailed list with the new features is available on this page.

Visual Installer’s file list can be refreshed automatically

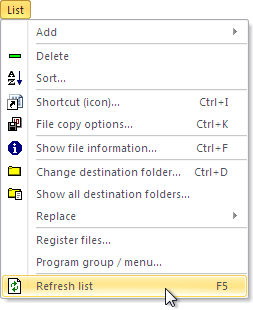
You may already know that if you press the F5 key on your keyboard or choose the List – Refresh List menu item in Visual Installer’s editor, the contents of the file list (in the editor’s File List tab) is refreshed.

When a file list is refreshed, file dates and size information etc. is updated. If a file is missing at a source file path, you will be informed about that.

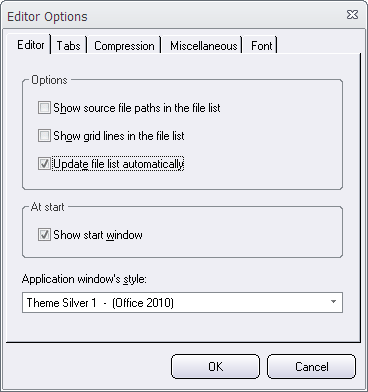
If you want to have the file list refreshed automatically when a project is opened, this is also possible. If you choose the Special – Editor options menu item and select the Update file list automatically option in the dialog box that is shown (see the picture below)

the file list will be updated automatically when the .VIP project file is opened.

How to ask for a drive instead of a folder during an installation

Normally when a user runs an installation, the installer will ask for a destination folder. A default folder name and folder path is shown, but the user can usually change the folder name and the folder path, and enter his/her own.

But there are situations when the folder name and folder path must stay unchanged, but the user should have the possibility to change the drive letter.

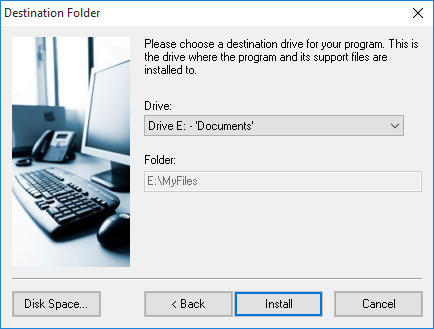
In Visual Installer we have a special setup dialog box that is designed for this purpose. You can include this dialog box in your installation by checking the Drive option in the Dialog boxes tab in the Visual Installer editor.

If you check this option, the following setup dialog box will be shown in the installation:

In this dialog box the end-user can change the drive letter, but not the folder path. The folder path is shown for the end-user, but it is a read-only field. He can not change the path.

The ‘Version’ tab in CD-Menu Creator

The CD-Menu Creator editor contains 8 main tabs, from where the most of the work to create a menu interface is made from. The last (the rightmost) tab is the Version tab.

In this tab you can enter version information for your menu project. For example company name, product name, product description and version number. In this tab you can also see the date when your menu was last created. This text field is updated automatically, so you don’t need to enter any information here.

Some of the text fields in the Version tab can also be used as variables in menu interfaces. That includes the following text fields: Company, Product Name, Product Description, and Version Number. More information about these variables is available in this tip.

How to test an installation before you create it

Before you actually create an installation package on your hard drive or USB stick, with Visual Installer, you can test it. You can step through all setup dialog boxes in your project and simulate an installation of you files. The tip below explains how to do it:

1. Start Visual Installer.
2. Open a current Visual Installer project or create a new one.
3. Open the File menu.
4. Choose Test on the menu.
5. In the dialog box that is opened, click on the Start simulation button.

Now the simulation will start.

The simulation will look like a real installation, but no files are copied and no folders are created. The Registry will also remain untouched. There will be no changes in the computer at all, so you can run it safely to test your installation.

More tips
More tips for Visual Installer are available here:
> Tips & tricks for SamLogic Visual Installer

SamLogic’s Newsletter Issues in 2018

We have an international newsletter that is targeted for our international customers where we publish information and news related to our products and our company. We send the newsletter about 6 times/year. In the newsletter you can read about:

  • Information about SamLogic Software´s products
  • Tips and tricks for SamLogic Software´s programs
  • Technical and non-technical articles
  • Videos (tip videos and information videos etc.)
  • Special offers

Below you can view all newsletter issues that we sent during 2018:

> 06/2018 – Visual Installer now supports EV code signing
> 05/2018 – More information about the new Visual Installer 2018 and CD-Menu Creator 2018
> 04/2018 – Visual Installer 2018 and CD-Menu Creator 2018 has now been released
> 03/2018 – How to write-protect a file after installation (when using Visual Installer)
> 02/2018 – How to use the log function in Visual Installer
> 01/2018 – Top Lists 2017 – Most read articles, read blog posts and viewed videos

Subscribe to our newsletter
If you want to subscribe to our newsletter you can visit the web page below:
> Subscribe to SamLogic Software’s newsletter

How to change source folder paths for a group of files

Sometimes it is necessary to change source folder paths for a group of files in Visual Installer’s file list. This is necessary if for example some files have been moved to another folder location or if you change computer and the folder paths that are used in the new computer are different. But luckily, this is very easy done in Visual Installer. In the tip below we show how to do this.

How to change source folder paths for a group of files

1. Start Visual Installer and open your Visual Installer project file (.VIP file).
2. Open the List – Replace – Replace source folders menu item (see picture below).

List - Replace - Replace source folders

3. Enter the existing folder path and the new folder path in the dialog box that is shown.

Search and replace source folder

4. Click OK in the dialog box to do the replace operation.

Now every folder path that match the criteria will be updated in the file list.

To make sure that folder paths are correct spelled and really exists on the drive, you can hit the F5 button. If the folders do not exists, Visual Installer will show a warning message and show which files in the file list that have wrong folder paths.

See also
> How to view source paths in the file list in Visual Installer

How to make sure that a shortcut (icon) is created for all Windows accounts

In Visual Installer you can choose whether you want to add shortcuts (icons) for the Windows account that is used to install your files, or for all Windows accounts in the computer.

Mostly the Windows account that is used for installation is the same as the Windows account that is used to run the software or access the files. But this is not always the case. If different Windows accounts are used for installation and for daily use, you might end in a situation where there is no shortcut (icon) to access your software or files.

To prevent that this situation occurs, you can open the Program group / menu dialog box (via the List menu) in Visual Installer, and make sure that the Create program group / menu for all users option is selected in the dialog box. If not, you can select this option.

Program group / Menu

Now your shortcuts (icons) will be accessible for all users (all Windows accounts) in the computer. This affects also desktop shortcuts and other types of shortcuts.