Program for creating icons

Both SamLogic CD-Menu Creator and SamLogic Visual Installer give you the possibility to add your own icon to your project. To create an icon you need a program that helps you to form icons and in many cases Microsoft Visual Studio is sufficient for that purpose. However, Visual Studio has some flaws concerning icon handling (among others shortfalls with handling the color palettes) so if you want to make creating icons easier and escape those problems, it can be a good idea to use a program that specializes in the task instead.

There are several different programs at the market. We use Axialis IconWorkshop which is easy to use while still being a powerful tool. The program can create icons both for Windows and Mac OS and it can convert between them as well. If you use Visual Studio, you can add Icon Workshop as a plug-in into your Microsoft development environment.

You can read more about Axialis IconWorkshop at their webpage:

> Webpage – Axialis IconWorkshop

Visual Installer: You can set a relative size for the setup window

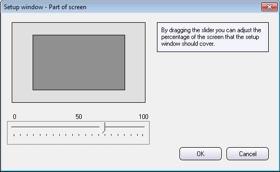
We have updated Visual Installer with a new function; you can now set a relative size for the setup window. The size is specified with a percent value, so the setup window will always cover a specified percentage of the screen. The percentage is easily specified using a visual slider (as shown in the picture to the right).

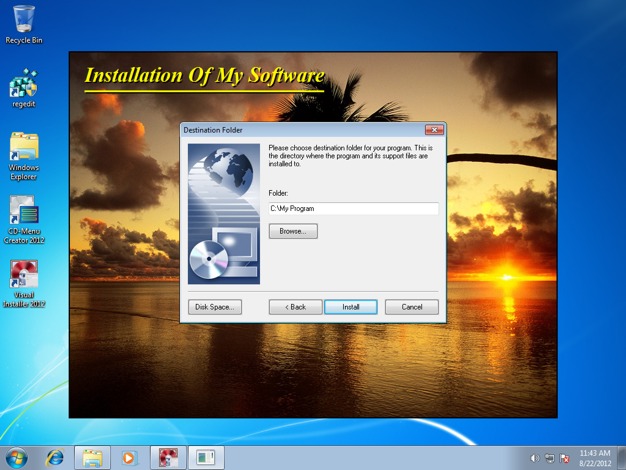
Below is a picture that shows how a setup window can cover a part of the screen.

Where to find the slider?
You can open the dialog box with the slider from two places in the program:

– Via the Object – Setup window menu item. Press the Change button to the right of the Percentage size option in the dialog box that is shown.

– When you choose a New project. Press the Settings button and Change size button.

(This function is available in Visual Installer version 9.5.20 and later.)

Review of SamLogic MultiMailer at FindMySoft

FindMySoft Review - MultiMailerFrederick Barton at the FindMySoft website has written a review of our newsletter marketing software SamLogic MultiMailer:
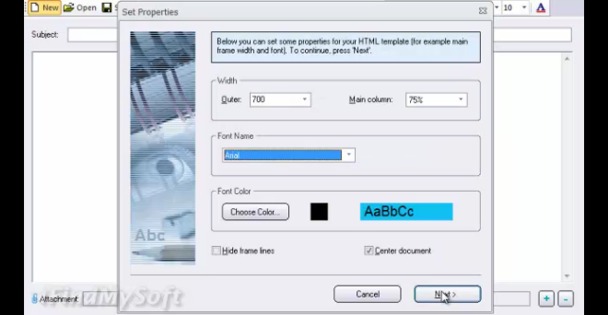
“Sending newsletters by email is one of the most efficient ways of marketing a product, so it is important to send newsletters to as many potential customers as possible. With SamLogic MultiMailer, you can do much more than send bulk emails. The software enables you to send personalized messages to all recipients, handle subscription requests and more.”

You can read the full review on this page on FindmySoft’s website:
> Review – SamLogic MultiMailer – Send newsletters to any number of recipients

On the web page you will also find a “quick look” video of SamLogic MultiMailer that shows some of the features in the software. The video highlights the way the application looks and works, and shows how to perform basic tasks with it.

Quick look video of SamLogic MultiMailer

Server for statistics and analysis of e-mail newsletter campaigns

If you have a newer version of the MultiMailer e-mail newsletter program you may have noticed that the program displays information about how many contacts that have opened and clicked on links in newsletters, and also who that have opened and clicked. All this is handled by two servers on the web. MultiMailer can download the information and show the statistics and data in the Statistics tab of the program.
Where are the servers?
The two servers are located in the following two domains on the Internet:

Server 1: https://www.samlogic-multimailer.com
Server 2: https://www.multimailer-statistics.com

Server 1 is dimensioned for minor e-mail campaigns and server 2 is dimensioned for larger e-mail campaigns.

Create a menu interface for a USB stick with USB Menu Creator

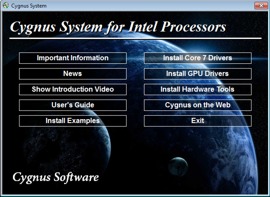
USB Menu Creator is a new product from SamLogic Software that can be used to create AutoRun menu interfaces for USB sticks / pen drives. The created menu interface will be opened automatically when the USB stick is plugged into a USB port in the end-user’s computer. From the menu the end-user can start a setup program, run an application, open a document, play a video or Flash animation, open a web page etc.

USB Menu Creator is a special bundle that contains the following three SamLogic programs:

SamLogic CD-Menu Creator – A tool that can be used to design menu interfaces.
SamLogic USB AutoRun Creator – Adds AutoRun capabilities to USB sticks.
SamLogic Image Resizer – Resizes and adapts images for use with menus.

More information
More information about USB Menu Creator is available on the following page:

> USB Menu Creator – Creates AutoRun Menu Interfaces for USB Flash Drive Device

What is EV Code Signing?

EV Code Signing, also called Extended Validation Code Signing, is a new code signing method that is supported by the new Microsoft Windows 8 operating system and by the Internet Explorer 9 and Internet Explorer 10 web browsers. It’s considered to be a safer method than traditional code signing because a hardware token and a PIN code is involved in the code signing process.
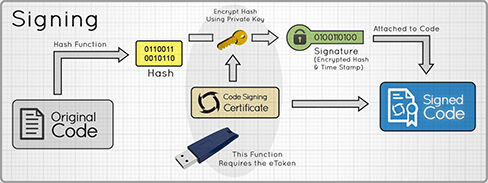
Also the identity verification and authentication process is more rigorous. The process is similar to the process of getting EV SSL certificates. On the negative side is that EV Code Signing is more expensive than traditional code signing.

Read our article about EV Code Signing
If you want to know more about the EV Code Signing technology you can read the following informative article on our website:

> Extended Validation (EV) Code Signing

Review of SamLogic CD-Menu Creator at FindMySoft

FindMySoft Review - CD-Menu CreatorFrederick Barton at the FindMySoft website has written a review of our product SamLogic CD-Menu Creator:

“The software provides a tabbed interface, on which you may customize your menu. Each element has its own tab, with various configuration options. For example, if you select the second tab, you can type the menu’s title, change its font settings and color, align it, add text effects and more. Regardless of which tab you select, you will always find the same options on the lower part of the interface. You can use them to preview your menu, on a separate window, create or execute it.”

You can read the full review on this page on the FindmySoft’s website:
> Review – SamLogic CD-Menu Creator – Create menus for CDs, DVDs and USB flash drives

On the web page you will also find a “quick look” video of SamLogic CD-Menu Creator that shows some of the program’s features. The video highlights the way the application looks and works, and shows how to perform basic tasks with it.

Quick look video of SamLogic CD-Menu Creator

How to install (and register) an ActiveX component

In the previous blog posts we have described how to add an ActiveX component (control) to a Microsoft Visual Basic project and to a Microsoft Excel sheet. When you distribute your Visual Basic or Excel application you must remember to distribute the ActiveX component file (.OCX file) together with your other files. It is also important to install the ActiveX component in the correct folder in end-users’ computers’ hard disks, and it is also important to register the ActiveX component in the system.

The ActiveX component must be installed in the correct folder
It is important to install an ActiveX component to the correct folder in Windows. If the ActiveX component is not a side-by-side component (can run side-by-side with a component with same filename) the component must be installed to Windows system folder, or to another shared folder. You should also make a version check before you install the component to the folder. A version check ensures that a component with a lower version number never replaces a component with a higher version number.

If the ActiveX component is installed to a local folder (for example to the same folder as the application) and other versions of the component already exist in other folders, there may be a conflict if two different programs that uses different versions of the ActiveX component are running in the same time. The ActiveX component that is loaded first will prevent the second one be loaded to the memory, and if the second one is a newer version, there may be problem with missing properties, methods or events, which can lead to an unstable program or that the program doesn’t start all.

Most installers install ActiveX components to Windows system folder. That’s why you also should do the same. By installing the ActiveX component to the system folder, the problem described above will not happen. If you install a newer version of the ActiveX component, it will replace the older one. And there will always be only one version of the ActiveX component in the system. There will be no duplicates with different versions numbers.

Special considerations in a 64 bit Windows
Things are getting somewhat more complex in a 64 bit version of Windows operating system. In a 32 bit Windows there is only one system folder, but in a 64 bit Windows there are two system folders. One system folder is intended for 32 bit (executable) files and one system folder is intended for 64 bit (executable) files. It is important to copy the ActiveX component to the correct system folder, otherwise it will not be found by the application. The paths to the two system folders in a 64 bit Windows are the following:

For 64 bit files: C:\Windows\System32
For 32 bit files: C:\Windows\SysWOW64

We explain this further in the following technical article on our website:
> Windows 64-bit: The ‘Program Files (x86)’ and ‘SysWOW64’ folders explained

The ActiveX component must be registered in the system
Copying an ActiveX component to the correct folder in the end-user’s hard disk is just the half of the job. The ActiveX component must also be registered in the system before it can be used. If you use a setup program for the installation of your application and the ActiveX component, the setup program will probably register the ActiveX component for you. But if you distribute your application in another way, there is a special program in Windows that can be used to register the ActiveX component. The name of the program is Regsvr32 and it is quite simple to use the program. If you want to register an ActiveX component you should call the Regsvr32 program with a full file path to the ActiveX component as a command line parameter. For example:

regsvr32.exe c:\windows\system32\SLXCal.ocx

Two versions of the Regsvr32 tool in a 64 bit Windows
If the Windows that you are running is 64 bit, you should be aware of that there is a 32 bit version and a 64 it version of the tool:

The file path to the 64-bit version is: C:\Windows\System32\regsvr32.exe
The file path to the 32-bit version is: C:\Windows\SysWOW64\regsvr32.exe

If your application and ActiveX component is 32 bit (which is very likely) you should use the Regsvr32 program that is located in the SysWOW64 folder.

You will find more detailed information about the Regsvr32 tool in the following article on Microsoft’s website:
> How to use the Regsvr32 tool and troubleshoot Regsvr32 error messages

It’s a good idea to use a setup tool
As you can see there are lots of things to consider when installing an ActiveX component in Windows. Doing all this manually will take some time. A better idea is to use a setup tool for this purpose. There exists many setup tools on the market today, but we have an easy to use setup tool that we recommend. You can read more here:
> SamLogic Visual Installer – An easy-to-use installation software

How to add an ActiveX component to an Excel 2010 sheet

1 month calendarIn the previous blog post we described how to add an ActiveX component (control) to a Visual Basic 2010 project. In this blog post we will describe how to insert an ActiveX component in an Excel sheet. We will show the necessary steps to include an ActiveX component in a sheet in Microsoft Excel 2010. We will use the same calendar component as in the previous blog post in this step-by-step example (we will use the one month calendar from SamLogic Calendar Components).

How to add an ActiveX component to an Excel 2010 sheet

1. Start Microsoft Excel 2010.

2. First make sure that the Developer tab is visible in the Ribbon interface. If not, follow the steps (A-E) below:

A. Open the File tab in the Ribbon.
B. Select Options.
C. Choose Customize Ribbon.
D. Check the Developer checkbox.

Customize Ribbon - Developer

E. Close the Excel Options dialog box. The Developer tab in the Ribbon interface should now be visible.

3. Open the Developer tab.

4. Click on the Insert Controls option.

5. Click on the More Controls option in the ActiveX Controls group.

Developer - Insert Controls - More Controls

6. From the control list in the More Controls dialog box, choose the SamLogic SLXCal Control control and press the OK button.

More Controls

7. A cross-like cursor will now appear. Click somewhere in the sheet to specify the calendar component’s position in the sheet.

The calendar component in an Excel sheet

The calendar component should now appear in the sheet as shown in the picture above.

That’s all steps that we need. We have now added an ActiveX component to an Excel sheet!

Events
The calendar component is event driven, so if you want to open up an event handler for the calendar you can double-click on the calendar component. The DateChanged event handler will now be shown in a code window.

The code window in Microsoft Excel

If you click on the dropdown list in the upper right of the code editor you can choose another event handler, for example the DateSelected event handler. The DateChanged event is fired when a user changes month in the calendar and the DateSelected event is fired when a user clicks on a date (day number) in the calendar.

Properties
You can set some properties for the calendar component before it is used. If you switch back to the Excel sheet with the calendar and right-click on the calendar and choose the Properties menu item in the local menu that is shown, you will find a list with properties for the calendar component. If you want to set any properties before any code is executed you can set them here.

Properties

After the execution of the code has started, you can change properties for the calendar component programmatically.

More information about the one month calendar component
More detailed information about the one month calendar component in SamLogic Calendar Components, including a complete list of all properties, events and methods in the component, is available on this web page:

> One-Month Calendar Component (ActiveX)

In the next blog post
In the next blog post we will show how to install an ActiveX component in a Windows system. Just copying an ActiveX component to a computer’s hard disk is not enough; no, it needs also to be registered in the system. And it is important that the component is installed in the correct folder on the hard disk, otherwise a software using the component may get problem finding the component. In the next blog post we will describe the process of installing an ActiveX component in a Windows system closer.