Create / Install an AutoCAD profile from Visual Installer

CAD, computers and people

Visual Installer is a very flexible setup tool and has built-in support for installation of AutoCAD profiles for Autodesk AutoCAD. Visual Installer can create a named profile for AutoCAD directly in Windows Registry, and add the settings and values that you want to use with the AutoCAD profile directly from the installer. You can also update an installed profile afterwards, or uninstall an installed profile.

AutoCAD - Logotype
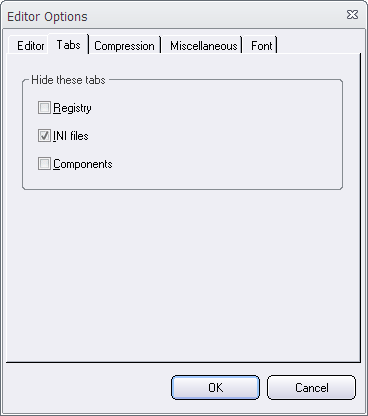
To give you a great flexibility when creating or updating AutoCAD profiles, we have added some special variables to the Registry tab in Visual Installer. By using these special variables it is easy for you to install or update AutoCAD profiles. These variables can also be used to find folder locations and other information that is used by Autodesk AutoCAD.

Visual Installer can handle different versions of Autodesk AutoCAD, and we update the support for this well-known CAD software continuously. Both AutoCAD and AutoCAD LT, and both 64 bit and 32 bit versions of the software are supported.

For more information about Visual Installer’s AutoCAD support and the special variables mentioned above in this blog post, see the AutoCAD profiles section in Part VII in Visual Installer´s User Guide.

How to add DKIM and DMARC to your domain

Abstract

We have published two articles on our website that explains what DKIM and DMARC are and why it is good to add them to your domain name (if you have not done it yet). It is especially important if you send email newsletters. Click on the links below to read the articles:

> Article: DKIM – How to add this to your domain
> Article: DMARC – How to add this DNS record to your domain

See also
> How to add / update SPF for a domain

Special Newsletter Series: 100 tips for SamLogic’s Tools

We have published many tips for our tools on our website, and in a special newsletter series we have listed links to more than 100 tips for Visual Installer and CD-Menu Creator / USB Menu Creator. You can read the newsletter issues by clicking on the links below:

> Special Issue #1 – 100 tips for SamLogic’s tools (part 1 of 3)

> Special Issue #2 – 100 tips for SamLogic’s tools (part 2 of 3)

> Special Issue #3 – 100 tips for SamLogic’s tools (part 3 of 3)

Subscribe to our newsletter
If you want to subscribe to our newsletter you can visit the web page below:
> Subscribe to SamLogic Software’s newsletter

Why SPF is important + How to update SPF for your domain

SPFSpammers often try to use false domain names in the sender’s e-mail address, and to prevent this happen, a technology called SPF can used. By utilizing SPF you can reduce the risk of abuse of your domain name.

SPF is also important if you send your own e-mail newsletters, because correct SPF settings will increase the deliverability of your e-mail newsletters and reduce the risk that your e-mails are rejected or put in the spam folders. The recipients’ servers will trust your domain name more if they find correct SPF settings for the domain.

We have published an article on our web site that explains more what SPF is, how it works and how you can use it to protect your domain names from abuse. The article also explains more in detail why it improves the deliverability of legitime e-mails.
Click on the link below to read the article:

> Article: How to add / update SPF for a domain

How to install Access Runtime from Visual Installer

Access - Logotype
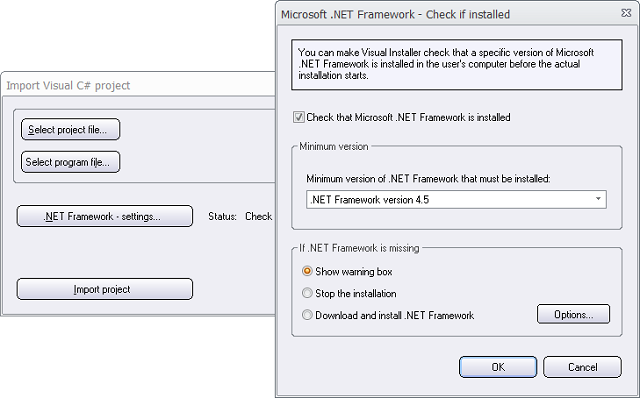
If you are going to distribute a Microsoft Access database with your Visual Installer installation project, you probably want to install a corresponding Access runtime engine also, in your end-users’ computers. By installing an Access runtime engine, the end-users do not need to have the full Access version installed in their computers.

Installing an Access runtime engine can be done from Visual Installer during Visual Installer’s own installation process.

We have published a new tip on our website that describes how to do this:

> Tip: How to install Access Runtime from script

Hiding tabs in the Visual Installer editor

The Visual Installer editor contains 6 main tabs: File list, Design, Dialog boxes, Registry, INI files, and Components. But some of these tabs can be hidden if you never use them.

The following tabs can be hidden: Registry, INI files, and Components.

Main tabs in Visual Installer

To hide a tab, you can choose the Special – Editor options menu item in the Visual Installer editor. Thereafter you can click on the Tabs tab in the dialog box. And now you can select (check) the tabs that you want to hide. See the picture below for an example:

Editor options

Finally, click OK to save the settings.

Now will the tab(s) that you selected in the Editor options dialog box be hidden in the editor.

How to check if Microsoft Office is installed during an installation

Sometimes it can be useful to check if Microsoft Office is installed in a computer during an installation. There are conditions available in Visual Installer’s script language that can be used for this. The conditions in the script language can examine the following:

• check whether Microsoft Office is installed in the computer or not
• check if the installed Microsoft Office is 32 bit or 64 bit

This can be useful if you for example:

• install files that require that Microsoft Office is installed in the computer
• install files that require a specific bitness of Microsoft Office (for example 32 bit Office)
• want to install different files depending on the bitness of Microsoft Office

How to check if Office is installed
If you want to check if Microsoft Office is installed in the end-user’s computer you can use the IF OFFICEINSTALLED condition in Visual Installer’s script language for this purpose. If you want to check the opposite, if Microsoft Office is not installed in the computer , you can use the IF NOT OFFICEINSTALLED condition instead.

Below you can see how these two conditions can be used:

The 'IF OFFICEINSTALLED' condition

How to check Office bitness
There are 32 bit and a 64 bit versions of Microsoft Office available, and if you distribute executable files or components that co-operate with Microsoft Office (for example with Microsoft Excel or Microsoft Access) the bitness of the executable files or components that you install must often be the same as the bitness of the installed Office.

To handle this in a smooth way, you can use a another condition in Visual Installer’s scripting language. The name of the condition is IF OFFICEBIT=?? where ?? can be 32 or 64. For example IF OFFICEBIT=32, which checks if a 32 bit version of Office is installed.

Below you can see how this condition can be used:

The 'IF OFFICEBIT=' condition

Another example
Below is another example, where the conditions above are combined. First the script lines checks if any version of Office is installed in the computer, and thereafter the script lines starts an installation with the same bitness (32 bit or 64 bit) as the installed Office:

All Office check conditions altogether

If no Office application is installed in the system, an information message box is shown (line 4) and the installation stops (line 5).

See also
> Visual Installer’s Scripting Language
> Check if the operating system is 32 bit or 64 bit

How to handle menu interfaces with many buttons

With the CD-Menu Creator menu designer tool you can create a graphical menu interface that contains more than 40 buttons in one menu window. This allows your customer to open many documents, applications or sub menus from the same menu page, but sometimes it can be difficult to make all buttons fit in one menu window in a proper way. Luckily there are some tricks that you can use and we will explain them below:

1. Place the buttons in 2, 3 or more columns
With CD-Menu Creator you can create a menu interface where the buttons are placed in columns. You can place them in 2, 3 or more columns. The picture below shows how it may look like with 2 columns of buttons:

Menu with 2 columns of button

Information about how to arrange the buttons in columns is available in this tip:
> Tip: How to create a menu interface with 2 or 3 columns with buttons

2. Use clickable links instead of framed buttons
Another solution is to use clickable links instead of framed buttons. Links takes less space than buttons. The picture below shows how it may look like:

Menu with clickable links

To use clickable links in a menu, choose the Text only option in the Style combo box in the Buttons tab in CD-Menu Creator.

3. Shrink button height and distance between buttons
You can also change the height of the buttons, so they take less vertical space. The vertical distance between buttons can also be reduced, so they are placed more close to each other.

Menu - The Beatles

The height of the buttons in a menu can be changed in the Height text box in the Buttons tab in the CD-Menu Creator editor. Information about how to shrink the distance between buttons is available in this tip:
> Tip: How to adjust the button’s position in the menu window

But what to do if you need even more buttons?
Sometimes one menu window is not enough – no matter how you arrange the buttons. The solution then is to split the buttons (or clickable links) in two or more menu pages; for example a main menu and couple of sub menus. Luckily there is an easy way to do this, and the following tip shows how:
> Tip: How to create multiple menus – Two levels of menus

Bonus tip: Create button groups with titles
If there are some free space available in a menu, it can be a good idea to group the buttons in a logical way and add titles to the groups. This will make it easier for a user to locate a specific button. You can read more about button groups and group titles below:
> CD-Menu Creator: You can now create button groups with titles
> Tip: How to create button groups with titles

How to create an installation for a Visual C# application

For many years Visual Installer have had built-in functionality to create an installation for a Visual Basic 6.0 and Visual Basic .NET application, and in the latest version of Visual Installer we have added the same functionality for Visual C#. You can now create an installation for a Visual C# application in an easy way.

Besides collecting necessary files and setting correct destination folders for your project, you can also specify minimum system requirements (for example minimum .NET version) for the installation package. If the necessary .NET versions are not installed, the installer can inform and handle the download directly from the installation wizard.

Read more
Here is some more information about the new function:
> Visual Installer 2020: Visual C# is now supported

And here is a step-by-step tip that show how to use the function:
> Tip: How to create an installation for a Visual C# application

If you need to quickly inform about the company’s actions regarding the coronavirus

If you quickly need to inform customers, suppliers and your employees, what measures the company has taken to deal with the coronavirus then e-mail is a very effective way. We have therefore decided that anyone who needs can get a free 3-month license of the SamLogic MultiMailer e-mail tool. More information about the tool is available at:
> https://www.samlogic.net/multimailer/multimailer.htm

Send an email to support@samlogic.com and we will email you the download link and a 3-month license key for SamLogic MultiMailer.

User’s Guide
This PDF contains information about the functions in MultiMailer:
> https://www.samlogic.net/multimailer/pdf/MM.pdf

Tips
On this website you will find tips & tricks for MultiMailer:
> https://www.samlogic.net/multimailer/tips/index-tips-tricks-multimailer.htm