Tip: How to install Access
Runtime
from script

 If
you are going to distribute a Microsoft Access database with
Visual Installer
(for example an .accdb file),
you probably want to install a corresponding Access runtime
engine also, in the end-users' computers. This can be done with Visual Installer and in this
tip we will explain how to do that. If
you are going to distribute a Microsoft Access database with
Visual Installer
(for example an .accdb file),
you probably want to install a corresponding Access runtime
engine also, in the end-users' computers. This can be done with Visual Installer and in this
tip we will explain how to do that.
In general, you need to follow these four steps:
1. Download an Access Runtime installation file from Microsoft's
website
2. Add the Access Runtime installation file to Visual
Installer's file list
3. Add a script that runs the Access Runtime installation file
during the installation
4. Choose correct bitness for your Visual Installer installation
project
Below we will explain the four steps in detail:
|
1. Download Access
Runtime |
You can download an Microsoft Access Runtime installation file
from Microsoft's website. There are different versions of the
Access Runtime available and you should choose an installation
that matches your database file version. Below are direct links
to some of the available versions:
>
Access Runtime 2010
>
Access Runtime 2013
>
Access Runtime 2016
Note. The bitness of your database must match the bitness of
Access runtime engine. If you have created your database with
the 32 bit version of Access, you must also download and install
the 32 bit version of the runtime engine. You can read more
on this page.
|
2. Add Access
Runtime to Visual Installer's file list |
After you have downloaded the Access Runtime installation file,
you can add it to Visual Installer's file list. The steps below
shows how to do this:
1. Start Visual Installer and create a new project or open an
existing.
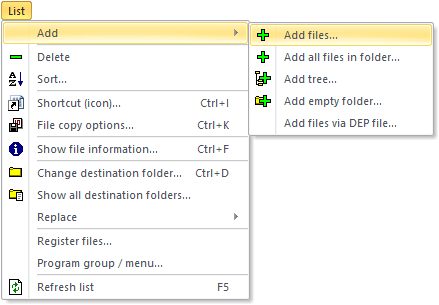
2. Choose the List - Add - Add Files menu item.

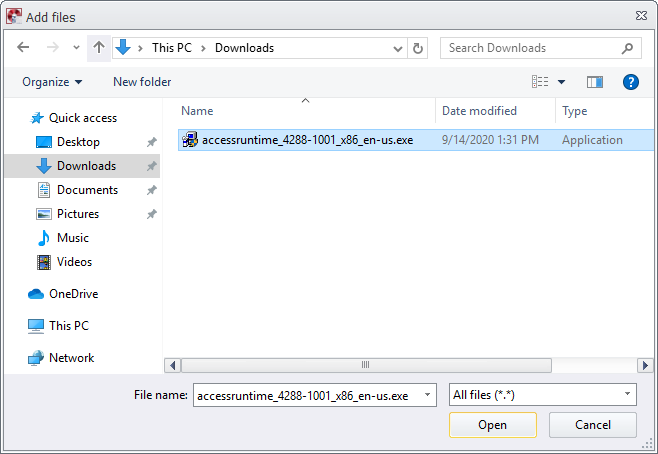
3. Browse after the Access Runtime installation file.
4. Select the file and click Open.

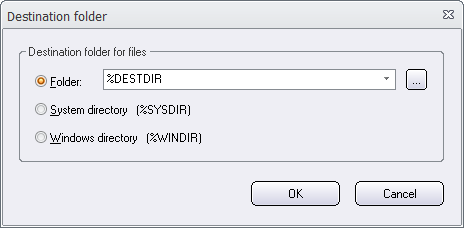
5. Enter a destination directory for the file, for example
%DESTDIR.

6. Click OK.
The Access Runtime installation file has now been added to the
file list of your installation project. You should see it in the
list with files.
The Access Runtime installation file is now included in your
project. Next step is to add a script that starts the
installation during Visual Installer's installation process. We
will use Visual Installer's script editor and script language
for this. If you are not familiar with Visual Installer's script
language, you can read
this tip first before you proceed.
To add script, follow the steps below:
1. Open the script editor by choosing the Special -
Execute script command menu item.
2. Open the After installation tab in the script
editor.
3. Enter the following in the After installation
tab in the script editor:
// Install Microsoft Access Runtime - if
not installed
IF NOT OFFICEINSTALLED
XRUN
%DESTDIR\accessruntime_4288-1001_x86_en-us.exe, 4
MSGBOX Ready, Installation
of Access Runtime completed!, 1
END IF
// Delete Access Runtime installer - we
don't need it anymore
XDELETE
%DESTDIR\accessruntime_4288-1001_x86_en-us.exe
|
4. Click OK to close the script editor and store the
script lines in the project.
If you want a closer explanation of the script code lines above
you can open this page.
|
4. Choose correct
bitness for your installation project |
 The bitness of your Visual Installer project file should match
the bitness of your database file and the bitness of the Access
Runtime installation file (that you added to the file list at
section 2 above). As default, the bitness of a Visual Installer installation
project is set to 32 bit. So you only need to change bitness for
the installation project if you have added a 64 bit database and
64 bit Access Runtime file to the project's file list. The bitness of your Visual Installer project file should match
the bitness of your database file and the bitness of the Access
Runtime installation file (that you added to the file list at
section 2 above). As default, the bitness of a Visual Installer installation
project is set to 32 bit. So you only need to change bitness for
the installation project if you have added a 64 bit database and
64 bit Access Runtime file to the project's file list.
You can read
this tip about how to change bitness for a Visual Installer
project.
These are all necessary steps you need to do to create an installation that
installs Microsoft Access Runtime engine in a computer / Windows system
during the Visual Installer installation process. Now you can
add the rest of your files to the project (for example your
Access database file if you don't have added it yet) and set
other properties that is necessary for your installation.
See also
 Visual
Installer's Scripting Language Visual
Installer's Scripting Language
 How
to run an MSI installation from script How
to run an MSI installation from script
|
< Tips Index Page
|
 |
Visual
Installer Tip |
|
|
Only Professional
Version |
|